Integrations

Learn more about how to connect Hugo, Wordpress, Ghost and other publishing channels to Editorial Sync. More coming soon, let us know if you are waiting for a specific platform to be supported.

Connect Hugo to Editorial Sync

The static site generator Hugo is supported out of the box. Here we explain the steps needed to make Hugo submit posts to Editorial Sync.

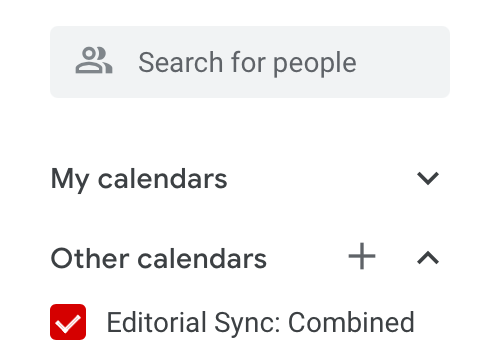
Setting up Hugo to send its posts to Editorial Sync is simple. We use the RSS feed that's generated by Hugo to get a list of posts. Depending on your use case you can let Hugo include posts that are currently in "Draft" mode or are not yet released (Published date in the future).

1) Figure out where your RSS feed is stored

The first step is to check where Hugo stores your RSS feed. To do that just execute hugo build and you should find an *.xml file in your public/ directory. More information about this in the Hugo documentation.

2) Make sure format is valid

Editorial Sync currently supports feeds based on the Atom or RSS specification.

We currently need the following fields:

  • entry.id
  • entry.title
  • entry.content
  • entry.published
  • entry.link

Example of a valid feed:

<feed xmlns="http://www.w3.org/2005/Atom">
    <title>My blog</title>
    <link href="https://example.com/index.xml" rel="self"/>
    <link href="https://example.com/"/>
    <updated>2021-01-28T18:12:51+01:00</updated>
    <id>https://example.com</id>
    <generator>Hugo -- gohugo.io</generator>
    <entry>
        <title type="html"><![CDATA[The title of the post]]></title>
        <link href="https://example.com/posts/first-blog-post/"/>
        <id>ce43b84aa051b883</id>
        <author>
            <name>Joe Doe</name>
        </author>
        <summary>A short summary</summary>
        <published>2021-01-28T18:12:51+01:00</published>
        <updated>2021-01-28T18:12:51+01:00</updated>
        <content type="html">The full post content</content>
    </entry>
</feed>

3) Adapt build command

To connect Hugo to Editorial Sync you have to send your blog posts to our API. This can be done by doing a POST request to our API. The body of the request should contain the RSS / Atom feed that Hugo generated for you. Usually this is located in the public/ directory.

hugo build \
&& curl -X POST https://www.editorialsync.com/events \
-H 'Content-Type: application/xml' \
-H 'Authorization: Token yourTokenHere' \
  --data-binary @public/index.xml

We generate this command for you and it can be found by navigating to https://www.editorialsync.com/event_sources and then clicking "Edit" on the Channel you want to set up.

Optional: Include future posts and drafts

If you want to include future posts and drafts in your Editorial Sync calendar you have to tell Hugo to include these posts in the RSS / Atom feed by adding --buildFuture and --buildDrafts. This should in most cases be done in a separate build step in your CI that's only used to generate these draft / future posts.

The full command could look like this:

hugo --buildFuture --buildDrafts \
&& curl -X POST https://www.editorialsync.com/events \
-H 'Content-Type: application/xml' \
-H 'Authorization: Token yourTokenHere' \
  --data-binary @public/index.xml

Example for Netlify

If you are hosting your Hugo blog on Netlify you can generate a netlify.toml file in your Hugo directory to define the build steps.

With this example every build in the preview step (For example for every feature branch) would build the Hugo blog with all future and draft posts included and send them to Editorial Sync.

[build]
publish = "public"
command = "hugo --gc --minify"

[context.production.environment]
HUGO_VERSION = "0.80.0"
HUGO_ENV = "production"
HUGO_ENABLEGITINFO = "true"

[context.deploy-preview]
command = "hugo --gc --minify --buildFuture --buildDrafts -b $DEPLOY_PRIME_URL && curl -X POST https://www.editorialsync.com/events -H 'Content-Type: application/xml' -H 'Authorization: Token yourTokenHere' --data-binary @public/index.xml"

Need assistance?

If you are having troubles connecting please let us know.

Connect Wordpress to Editorial Sync

Without any configuration Editorial Sync will show all your currently published posts in your calendar. If you additionally want to show upcoming posts and drafts you need to set up an Application Password in Wordpress and tell Editorial Sync about it. This only takes 1-2 minutes.

It just takes a couple of minutes to make Editorial Sync fetch all posts from your Wordpress blog. If you don't want to show drafts or posts scheduled to appear on your blog in the future you don't need to set up anything and can ignore the following instructions.

Published posts

No additional setup is necessary. We just need the URL to your blog and we'll fetch all your posts using the default Wordpress API.

Drafts and upcoming posts

If you want your drafts or upcoming posts to show in your Editorial Sync calendar we need additional permissions to use the authenticated Wordpress API. For security reasons we don't want access to your password, the common way for this use case is to set up a specific "Application Password" in Wordpress that is only used for Editorial Sync, there's a simple and popular plugin that enables you to do that.

Install plugin

Install the Application Passwords plugin and make sure it is enabled.

Create Application Password

Once the plugin is installed navigate to your user preferences, scroll down until you see the "Application Passwords" section. Pick a name that helps you recognize what this password is for (Something like "Editorial Sync" will work just fine) and click "Add New".

After clicking on "Add New" you'll be shown a password similar to this one. Make sure to write it down as you'll need it in the next step.

Configure Editorial Sync to use Application Password

If you are adding a new Wordpress channel you'll see a field called "Wordpress Application Password". Paste your Application Password from the previous step and prepend it with your Wordpress user name.

Done

We'll now periodically fetch all your drafts, upcoming and currently published posts and make them available in your Editorial Sync calendars. You'll see if it worked if the "Events stored" counter on your dashboard reflects the number of posts on your blog.

Sync your Editorial Sync calendar to Apple Calendar

To subscribe to your Editorial Sync Calendar with the Apple Calendar app on iOS or macOS you have to first get your private calendar feed from editorialsync.com/calendar

Navigate to "File" > "New Calendar Subscription", paste the URL you copied from Editorial Sync and click "Subscribe"

You can customize how the calendar will be listed in Apple Mail. Make sure to set the refresh time to something that reflects how you use the app. If you have frequent changes in your blog post schedule you should set it to a more frequent refresh rate.

Sync your Editorial Sync calendar to Google Calendar

To subscribe to your Editorial Sync Calendar with the Google Calendar you have to first get your private calendar feed from editorialsync.com/calendar

Open Google Calendar and look for the "Other calendars" section. Click the "+" sign and select "From URL".

Paste your private Editorial Sync URL and click "Subscribe".

Now your calendar will be fetched by Google Calendar and shown across all your devices.

Editorial Sync

Easily sync your blog posts, drafts and upcoming posts to your calendar and plan your publishing.